
1. Safety essentials
The earlier SSS enclosure weighs approximately 50 kg. Before connecting it, observe these three essentials:
- Prevent tipping. A falling speaker can cause serious injury or damage. Position it securely and do not let children climb on or play around it.
- Keep it dry. Protect the speaker from rain, spills and water from plants. Do not place liquids on top.
- Do not open the enclosure. If a fault occurs, disconnect power and arrange service rather than opening the speaker yourself.
In normal use, the archived system managed its own active and sleep states. After the first network setup, no routine switching was required.
2. First startup and network setup
The earlier SSS was a self-contained network speaker. It could connect by Ethernet or Wi-Fi and appeared to compatible playback devices under the name Baffless.
Ethernet
- Connect the Ethernet cable before switching on the rear power switch.
- Connect power and move the switch to ON.
- Allow approximately two minutes for startup. The speaker should then become available on the network.
Wi-Fi
- Connect the power cord and switch the speaker to ON. During the roughly two-minute startup, the green rear LED blinks at about one-second intervals.
- On a phone or computer, open Wi-Fi settings and join Baffless-connect.
- Wait for the setup portal to open. Select your home Wi-Fi network, enter its password and press Connect.
- The portal closes after the speaker joins the selected network. You can then choose the Baffless speaker in a compatible network-audio application.
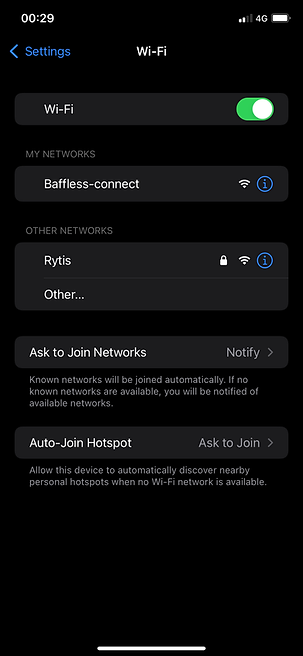
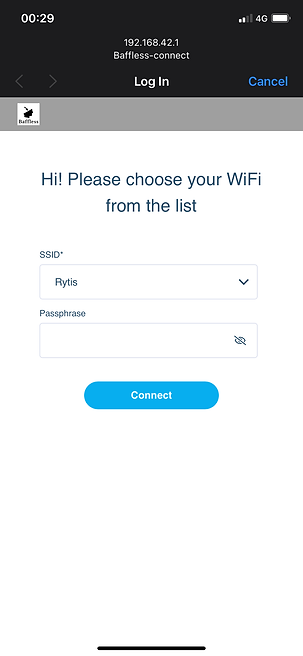
If the setup portal does not open: while still connected to Baffless-connect, enter baffless.local in a web browser. If that address cannot be resolved, find the speaker's IP address in your router and open that address instead.
3. Speaker controls
After the speaker joined the home network, its control page was available at baffless.local. If the local name did not resolve, the same page could be opened through the IP address listed by the router. Settings remained stored through reboot until changed or reset.
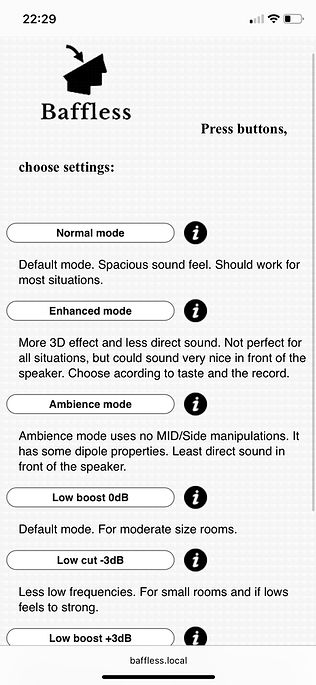
Listening modes
Normal
Uses beam steering with frequency-dependent mid/side processing. The side component is raised where needed to compensate for its longer reflected path and wall absorption.
Enhanced
The default on this archived build. It applies more side energy than Normal for a stronger spatial effect, especially directly in front of the speaker.
Ambience
Does not use the Normal/Enhanced mid/side treatment. It relies on beam steering with one channel polarity-inverted so reflected sound dominates, creating a more dipole-like presentation.
Low-frequency presets
The three presets applied a low-shelf adjustment around 100 Hz. The right choice depended on room size, placement and the resulting bass balance.
Restore defaults
The Restore defaults command returned the listening controls to their original values and deleted saved Wi-Fi credentials. Use it before transferring the speaker to another person or when moving it to a different wireless network. After reboot, Wi-Fi setup had to be completed again.
Left/right room-balance switches
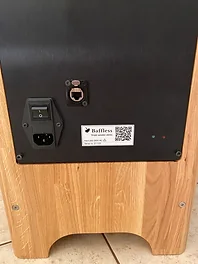
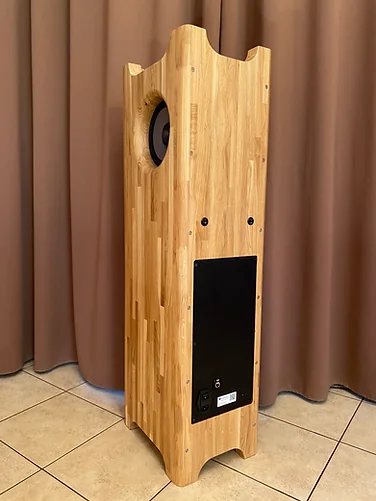
Two switches on the rear of the archived speaker adjusted its left and right radiation independently. Both were normally ON. Switching the right control off reduced the right side by 6 dB; the left control worked in the same way.
These switches were intended only for unavoidable asymmetry, such as one side wall being much closer or more absorptive than the other. Symmetrical placement remained preferable.
4. Protection and LED indicators
The green and red indicators were located beside the power inlet on the rear panel.
Green LED
Off: speaker switched off or sleeping.
Blinking: startup in progress.
On: ready and active, with the power amplifier enabled.
Red LED
Blinking: clipping protection activated and the amplifier switched off.
On continuously: temperature protection activated and the amplifier switched off.
A red indication on this build latched until power was switched off and on. If it blinked, reduce playback level before restarting. If the steady temperature warning returned after the speaker cooled, stop using it and arrange service.